While the X and Y axis represent distances horizontally and vertically on your screen, the Z axis represents distances perpendicular to your screen (out from your drawing towards yourself). You can specify a Z value for each line in your drawing. Z values are set in the Z control of the numeric bar (located just below the main toolbar):
![]()
The examples below show line drawings with assorted Z values and the resulting 3D shape.
Examples
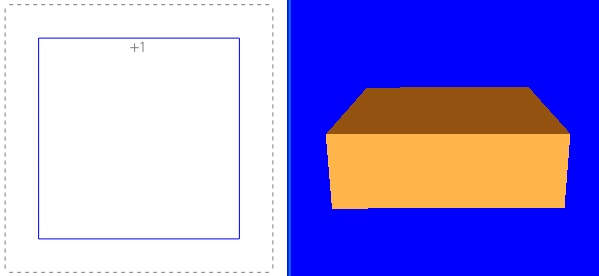
Below, the square is 3 x 3 inch. A Z value of 1 creates a block 3 x 3 x 1:
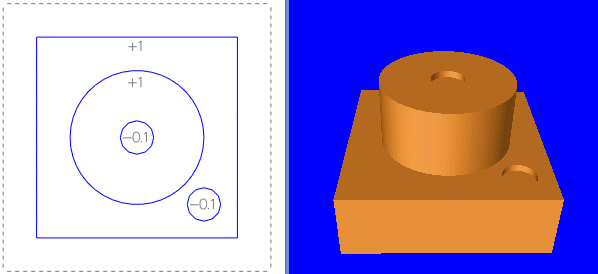
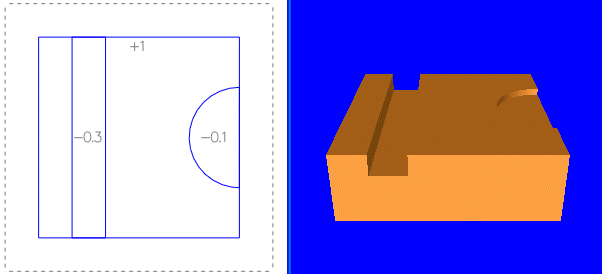
Now let’s add a second positive Z value and two negative Z values. Notice that positive Z values create protrusions and negative Z values create recesses:
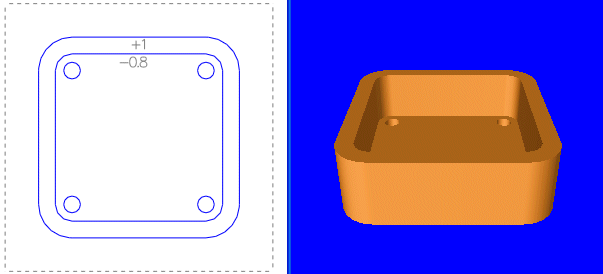
Z values can also apply to more intricate 2D shapes:
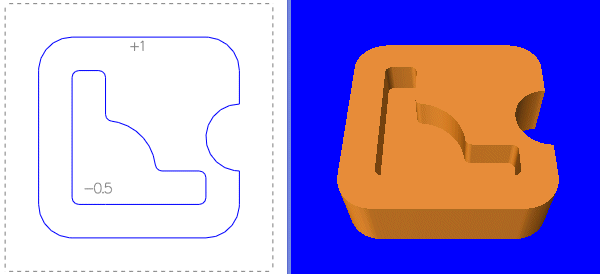
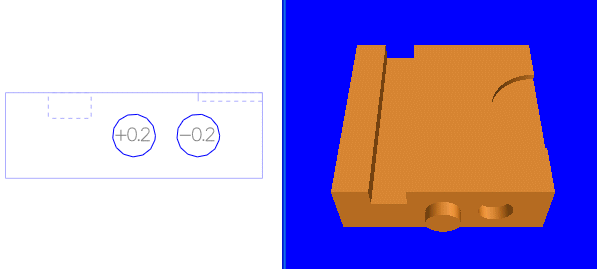
A simple 5-side box:
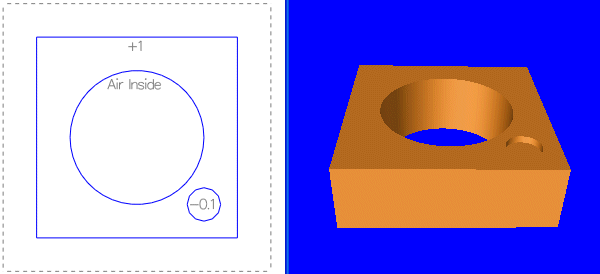
Z values can apply to shapes drawn in side views also. Here we select menu View | Front, add two circles and apply Z values:
Air Inside
To cut fully thru, set the Z edit control to "Air Inside".
Setting Z to Air Inside in a side view creates more capability. For example see the Pipe Spacer.

Minimize Z
When designing a part, try to use Z for the smaller dimensions. For example, a rectangular block 1 x 1 x 2" could be drawn in the Top view with a 1 x 1 square having Z set to 2 or a 1 x 2 rectangle having Z set to 1. The second way is preferred and will often result in lower cost. In some cases it will be necessary to minimize Z to resolve errors.
Add Material or Subtract?
You can design shapes by first drawing a block or cylinder that would encompass the full size of your part and using recesses (shapes with negative Z values) to remove material; or by starting with a base shape and adding protrusions (shapes with positive Z values).
If you are having difficulty creating a shape using the additive method try the subtractive method and conversely. You can also mix additive and subtractive methods in a design.
You can add or subtract material from multiple views. For example you might create a shape the Top view with positive Z and remove material in the Left view using a different shape with negative Z.
For shapes that can be formed by bending a sheet consider the Bend feature which is more economical.
Advanced tips
See also the Revolve feature of the Z control.
For drilled holes, the Z measurement is taken from the end of the cylindrical portion of the drill bit, not the tip of the conical portion.For threading features, the Z measurement applies to the thread depth/length and must be positive both for protrusions and holes. Use the Maximal setting to get the maximum thread depth/length value permitted by standard tooling.
