
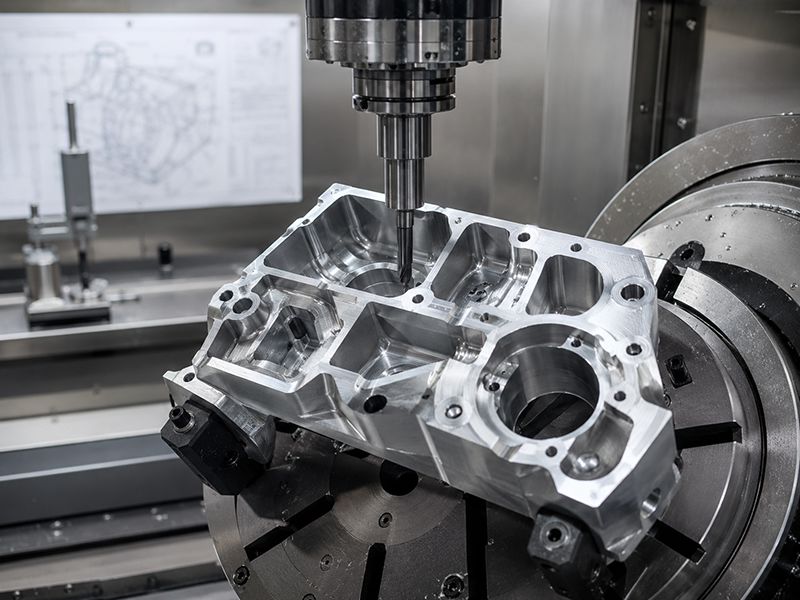
Most surprise CNC quotes trace back to four or five design choices, not the part itself — a tight tolerance on a feature that didn’t need it, a wall left too thin, a corner that should’ve had a radius. None of these make the part better. They just make it harder to cut.
Quick Summary
- Standard CNC tolerance is ±0.005″ — tightening it to ±0.002″ or below can add 25-50%+ to cost because it requires slower cuts, more inspection, and sometimes different equipment entirely.
- Walls thinner than 0.020″ risk breaking during machining or warping afterward, and should be avoided unless the design genuinely requires it.
- Sharp internal corners are physically impossible with a standard end mill — the tool is round, so every internal corner needs a radius, even if it’s a small one.
- Deep holes get expensive fast: past roughly 6x the hole’s diameter in depth, you often need specialized long drills or a different process entirely.
- The number of setups (how many times the part gets re-oriented in the machine) drives cost as much as the geometry itself — a part machinable from one side is cheaper than an identical part that needs to be flipped three times.
What Is Design for Manufacturability, Actually?
DFM is just the practice of designing a part so it’s cheap and reliable to make, not just correct on screen. A model can be dimensionally perfect in CAD and still be a nightmare to machine — the software doesn’t know or care how a cutting tool actually moves through material.
The gap between “this simulates fine” and “this machines fine” is where most quote surprises live. A tolerance that costs nothing to type into a CAD field can cost real money once it hits a machine, because achieving it might mean slower feed rates, extra inspection steps, or equipment your shop doesn’t normally reach for.
What’s the Standard CNC Tolerance, and When Do You Actually Need Tighter?
±0.005″ (±0.13mm) is the baseline most shops, including eMachineShop, work to without extra cost when a drawing doesn’t call out anything tighter. This default sits comfortably inside the broader tolerancing framework governed by ASME Y14.5, the standard most U.S. engineering drawings reference for how dimensions and tolerances are stated and interpreted in the first place. It’s tight enough for the overwhelming majority of mechanical parts — brackets, housings, spacers, mounting plates.
Tighter tolerances aren’t free. Dropping to ±0.002″ or below often means slower cuts to control tool deflection and heat, more frequent in-process measurement, and sometimes temperature-controlled environments to keep the material from moving as it warms and cools. The relationship isn’t a straight line either — manufacturing engineering research on tolerance allocation treats the cost of tightening a tolerance as a nonlinear function that climbs steeply once you’re past the easy range, not a modest step up. That’s not a shop being difficult — it’s the physics of holding a number that small.
The fix isn’t “never use tight tolerances.” It’s reserving them for the features that actually need them — a bearing bore, a press-fit diameter, a mating surface — and leaving everything else at the standard tolerance. A part with one tight-toleranced hole and everything else at ±0.005″ costs a lot less than the same part with every dimension needlessly tightened to match.
Why Do Thin Walls Cause Problems?
Below about 0.020″ (0.51mm), a wall gets fragile enough that it can crack or deform just from the force of the cutting tool passing by, before the part is even off the machine. If it survives that, it can still warp afterward as internal stress in the material releases.
If a thin wall is genuinely part of the design intent, it can usually still be made — but expect a conversation about it, and expect the finished part to vary slightly from the CAD model, since thin sections are the first thing to move. Where the wall thickness isn’t load-bearing or functionally required, thickening it removes the risk entirely and usually costs nothing.
Why Can’t CNC Mills Cut Sharp Internal Corners?
Because the tool is round. An end mill cutting a pocket or an internal corner leaves a radius behind, because a cylinder can’t produce a true 90-degree internal corner no matter how it’s moved. The radius left behind matches roughly the tool’s radius — a 1/4″ end mill leaves about a 1/8″ corner radius, minimum.
If a design calls for a genuinely sharp internal corner, the options are: add a small relief cut (a tiny extra notch past the corner) so the mating part can seat flush, accept the tool radius and design around it, or switch to a process like EDM that can produce a true sharp corner at added cost. Increasing a corner radius from 1mm to 3mm, where the design allows it, lets the shop use a larger, more efficient cutter and can meaningfully cut cycle time.
How Deep Can a Hole Actually Be Drilled?
Standard drilling gets impractical past roughly 6x the hole’s diameter in depth. Beyond that, the drill starts to wander off-axis, chip evacuation gets harder, and you often need a specialized long-flute drill or a switch to boring or gun-drilling, both of which cost more and take longer.
A 0.25″ diameter hole is fine down to about 1.5″ deep on standard tooling. Push that same diameter to 3″ deep and you’re into specialized-process territory. If the design allows it, a larger diameter hole reaches the same depth-to-diameter ratio without the extra process — worth checking before locking in a hole spec that seemed arbitrary in CAD.
Does the Number of Setups Actually Change the Price?
Yes, often more than the geometry does. Every time a part has to be unclamped, flipped, and re-fixtured to machine a different face, that’s added time, an added chance for misalignment, and in the worst case, a feature that ends up slightly out of position relative to a feature cut in a different setup.
A part with features on only one or two faces, oriented so the machine can reach them without repositioning, is meaningfully cheaper than a geometrically similar part with features scattered across four or five faces. This is also where multi-axis machines (4-axis, 5-axis) earn their cost premium — they can reach more of the part without a manual re-fixture, but the equipment itself costs considerably more to run, so it’s not automatically the cheaper option for a simple part.
Should You Specify GD&T, or Is a Basic Tolerance Good Enough?
For most parts, a basic linear tolerance is genuinely sufficient — GD&T is optional at eMachineShop and isn’t required to design or quote a part. GD&T earns its complexity on parts where a feature’s relationship to another feature matters more than its raw dimension — a hole that has to align with a mating hole across an assembly, a surface that has to stay parallel to a datum under load.
If you’re not sure whether a given feature needs GD&T, the practical test is this: does the part’s function depend on this feature’s relationship to something else, or just its size? Size alone, use a basic tolerance. Relationship to another feature or datum, that’s when GD&T starts paying for itself.
Frequently Asked Questions
Why did my quote come back higher than I expected? Almost always one of a handful of usual suspects: a tolerance tighter than the part needs, a wall thinner than the process likes, an internal corner sharper than a round tool can produce, or a hole deeper than standard tooling handles well. Checking a design against these before submitting it usually explains the number.
Does material choice affect these DFM rules? Yes — harder materials (stainless, titanium) amplify almost every issue on this list. A thin wall that’s marginal in aluminum is a real risk in stainless. A deep hole that’s routine in aluminum may need a different drill entirely in titanium.
Is DFM different for a one-off prototype versus a production run? The rules are the same, but the stakes shift. A single prototype might tolerate a slightly higher per-part cost from a DFM violation without much consequence. The same violation repeated across a thousand-unit production run compounds fast, which is why it’s worth fixing before scaling up, not after.
Can every feature that shows up fine in CAD actually be machined? No. CAD software will happily let you model an internal corner with zero radius or a wall thinner than any tool could leave standing — the software isn’t checking against what a cutting tool can physically do. That gap is exactly what a DFM review catches before it becomes a bad surprise on the shop floor.
What’s the single highest-leverage DFM fix? Reserving tight tolerances for the features that actually need them. It’s the one change that’s genuinely free to make (loosening an unnecessary tolerance costs nothing) and it’s the most common single line item driving up an otherwise ordinary quote.
Not sure if a design is fighting the process before you submit it? Upload the CAD file and we’ll flag anything worth a second look before it’s quoted.
Written by James Wright, eMachineShop